Ever heard of the Japanese Blue Salt Trick Recipe? I gotta say, this blew my mind the first time I tried it. You know when you want homemade onigiri and your kitchen skills just aren’t giving you those perfect salty little rice triangles? I get it, I’ve been there, totally frustrated. The blue salt trick changes the game and, let’s be honest, makes you look like you pulled a five-star restaurant-level move right at home. It’s honestly easier than making a braided chocolate chip brioche recipe—and way less stressful. Stick with me, I’ll walk you through everything, with some real-life mishaps tossed in.

What is Onigiri?
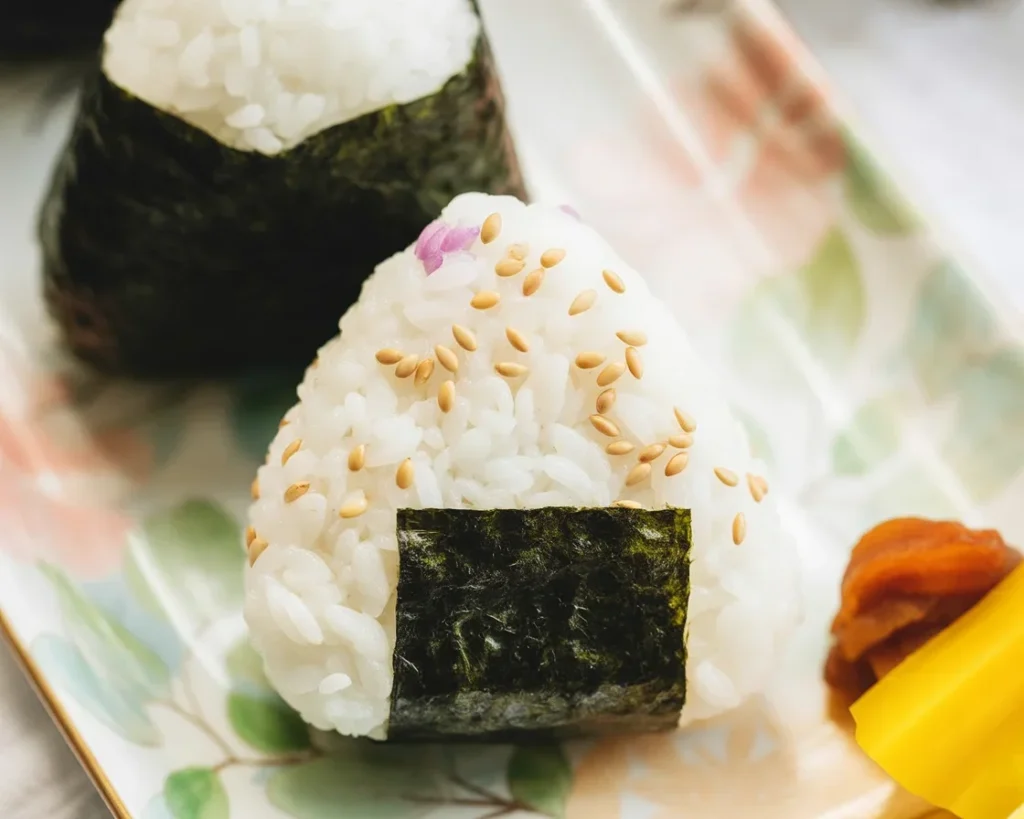
Let’s clear up something first. Onigiri is basically Japanese rice balls (sometimes triangles, sometimes another funky shape) with a salty, savory vibe. Sometimes folks call them Japanese sandwiches, but don’t go stuffing lettuce in them or anything weird—that’s just not it. They’re a lunchbox staple in Japan. Got a quick train to catch? Onigiri. Lunch meeting? Onigiri. I once saw a guy on the street in Tokyo eating one with both hands, grinning like a little kid. You bite into them and get a pop of umami—sometimes there’s filling, sometimes just salty rice. Best part for me? The seaweed wrapper. Chewy, a little crisp, just magic. That blue salt lifts the whole thing, trust me.

Onigiri Shapes & Sizes
Here’s where your creative soul gets to play. If you imagine Japanese onigiri as only perfect triangles, well, you’re missing out big time. Sure, triangle onigiri is classic, but I’ve eaten round ones, chunky rectangles, even cute bear-shaped ones—don’t ask, it was a themed party, and it got wild. Small onigiri are bite-sized, great for kids or honestly for snacking like you’re raiding the fridge at midnight. Bigger ones? Hearty enough for a meal. If you’ve got clumsy hands (like me after too much coffee), just shape ‘em however you can. Nobody at my table ever complained about a lopsided onigiri. Honestly, it just gives them character. The blue salt color pops on every shape, so don’t stress.

How to Make Perfect Onigiri?
Alright, time for the hands-on stuff (where I usually drop a little rice on the floor, not gonna lie). First, cook your rice. Short-grain Japanese rice is best, but hey—sometimes I use what’s around and it’s fine, not perfect, but delicious. While your rice is still warm (not scalding hot or you’ll cook your palms, ask me how I know), wet your hands. Grab a pinch of blue salt—don’t worry, it’s naturally colored with butterfly pea powder, not some weird chemical. Rub the salt over your palms, scoop some rice, press it gently into a triangle or ball, and tuck in your favorite fillings if you want. Tuna-mayo, pickled plum, whatever. Press, shape, and wrap with nori. That’s it. If the rice sticks to you more than to itself, you probably need wetter hands or less rice. Shrug. It’s forgiving, really.
I’ve struggled with onigiri for ages, always wondered how folks got them so pretty and tasty at the same time. Tried the blue salt trick—total game changer! I finally nailed it on my third try and they tasted straight out of a konbini!
– Chelsea F.
Tips & Tricks to Making Onigiri
Let’s be honest, nobody gets them just right without a little help. Number one, don’t skimp on the salt. Traditional onigiri isn’t bland, and the blue salt looks cool and tastes even cooler. If you can, use sushi rice, but leftover rice works in a pinch. Add a dash of vinegar if you like some zing. If your rice is too sticky, rinse it before shaping. If you’re into warm onigiri (I am), eat them fresh. But I’ve microwaved old ones and honestly? Still delicious. Once, I threw in a chunk of leftover chanterelle mushrooms. Total accident, but tasted incredible—don’t be scared to experiment.
How to Store Onigiri
Not that there will be leftovers (in my house, impossible), but just in case. Wrap each onigiri in plastic wrap tightly. Pop them in the fridge if you’re saving for later. They dry out after a day, so eat them fresh if you can. If you need to reheat, sprinkle a little water over them and wrap in a paper towel before microwaving. If you’re making lunch for the day, keep the nori (seaweed) separate until you eat—otherwise, it gets soggy and nobody likes a limp seaweed sheet. This trick saved my lunch more than once, by the way.
Serving Suggestions
- Sprinkle a bit more blue salt on top for color and pop
- Tuck in a side of pickled veggies or a little miso soup for a real bento feel
- Try stuffing them with spicy tuna, roasted salmon, or even your favorite tofu mix
- Make mini ones for parties—they disappear in seconds, I swear
Common Questions
Q: Can I use other colored salt if I don’t have blue salt?
A: Regular salt works perfectly, but the blue salt just gives it a fun, unique presentation—and hey, dinner conversations get way more interesting.
Q: My onigiri keep falling apart, what’s up?
A: Usually, your rice is too dry or you’re not pressing firmly enough. Warm, slightly sticky rice is your best friend here.
Q: Do I have to use nori on my onigiri?
A: Nope! Lots of folks eat them without any seaweed. If you’re in a pinch, just eat ‘em plain.
Q: What fillings are best for onigiri?
A: Honestly? Whatever sounds good. Pickled plums, leftover chicken, spicy mayo, or even leftover BBQ beef—get creative.
Q: Is it okay to make onigiri ahead for picnics?
A: Absolutely! Just keep them wrapped and add seaweed at the last second to avoid getting mushy.
Give the Blue Salt Trick a Whirl!
So that’s my crash course in mastering onigiri with the Japanese Blue Salt Trick Recipe. Keep your rice a bit sticky, don’t overthink the shapes, and always, always sneak a bite before sharing with friends. If you’re curious how other grains or fillings work, these chanterelle mushrooms recipes are a wild place to start. Curious about salt tricks? You might enjoy reading “I Tried the Pink Salt Trick for a Week — Here’s What Actually …” for some other wild experiences. And if you want a more traditional breakdown, the How to Make Onigiri (Japanese Rice Balls) | Ultimate Guide … is worth a peek. The blue salt thing isn’t just a trend—it really does transform the humble rice ball into snack gold. Seriously, get in your kitchen, try it, and let me know how many end up “accidentally” getting eaten before they hit the table. You got this.
Print
Onigiri with Blue Salt Trick
- Total Time: 30 minutes
- Yield: 4 servings
- Diet: Vegetarian
Description
Learn how to make perfect onigiri, the classic Japanese rice balls, enhanced by the unique blue salt trick for an unforgettable flavor.
Ingredients
- Short-grain Japanese rice
- Blue salt (or regular salt)
- Nori (seaweed)
- Fillings of choice (e.g., tuna-mayo, pickled plum)
Instructions
- Cook the short-grain Japanese rice according to package instructions.
- While the rice is still warm, wet your hands.
- Rub blue salt over your palms.
- Scoop some rice and press it into a triangle or ball shape.
- Optional: tuck in your favorite filling.
- Wrap the shaped rice ball with nori.
- Enjoy fresh, or store if needed.
Notes
Use sushi rice for the best texture. Don’t skimp on the salt for flavor. Wrap in plastic to store, and keep nori separate until consumption to avoid sogginess.
- Prep Time: 10 minutes
- Cook Time: 20 minutes
- Category: Snack
- Method: Making
- Cuisine: Japanese
Nutrition
- Serving Size: 1 onigiri
- Calories: 150
- Sugar: 0g
- Sodium: 300mg
- Fat: 0g
- Saturated Fat: 0g
- Unsaturated Fat: 0g
- Trans Fat: 0g
- Carbohydrates: 34g
- Fiber: 1g
- Protein: 3g
- Cholesterol: 0mg
Keywords: onigiri, Japanese rice balls, blue salt, easy recipes, lunchbox